Certainly! Here’s an even more detailed and comprehensive version of “How to Build and Deploy a Serverless Application in Minutes”:
The Power of Serverless Computing for Rapid Application Development
Serverless computing has transformed the way applications are built and deployed. The key benefit of serverless is that it abstracts away all infrastructure management, allowing developers to focus entirely on writing application code rather than provisioning and managing servers. This results in faster development cycles, reduced operational complexity, and the ability to scale applications effortlessly as traffic increases.
In this post, we’ll walk you through the entire process of building and deploying a serverless application in minutes. Using popular cloud platforms such as AWS Lambda and API Gateway, we’ll show you how to create a simple serverless application that scales automatically without you having to manage any infrastructure. Whether you’re a beginner or a seasoned developer, this guide will help you harness the power of serverless computing.
Key Features of Serverless Computing
- No Infrastructure Management: You don’t need to worry about servers, as the cloud provider handles all infrastructure concerns.
- Automatic Scaling: Serverless platforms automatically scale based on demand, ensuring efficient resource utilization without manual intervention.
- Pay-Per-Use Pricing: You only pay for the resources used during the execution of your functions, making it cost-efficient, especially for workloads with variable or unpredictable traffic.
- Event-Driven Execution: Functions are triggered by events (HTTP requests, file uploads, database updates), allowing for real-time processing and responsiveness.
- Reduced Development Time: Developers can quickly deploy code without worrying about provisioning resources, leading to faster time-to-market for applications.
1. Setting Up Your Serverless Environment
Before diving into the application code, it’s important to set up your development environment for serverless computing. In this section, we will configure an AWS account and make sure you have all the necessary tools to get started.
Steps to Set Up Your Serverless Environment
- Create an AWS Account: If you don’t already have an AWS account, go to the AWS website and create one. Many services, including Lambda, API Gateway, and DynamoDB, offer a free tier that you can use to get started.
- Configure IAM Roles: AWS Identity and Access Management (IAM) allows you to create roles that grant the necessary permissions to your Lambda function. Create an IAM role with the required permissions (such as Lambda execution and API Gateway invocation) to ensure your function can interact with other AWS services securely.
- Install the AWS CLI: The AWS Command Line Interface (CLI) allows you to interact with AWS services from your terminal. Install the CLI and configure it with your AWS credentials for easy management of Lambda functions and other AWS resources.
- Set Up Development Tools: If you’re using a specific programming language, install the necessary SDKs or runtime (e.g., Node.js for JavaScript, Python for Python, etc.). This will help you write and test your function locally before deployment.
- Activate API Gateway: In AWS, API Gateway acts as the entry point for web requests to invoke Lambda functions. Ensure that API Gateway is activated and that you have permission to create APIs within your account.
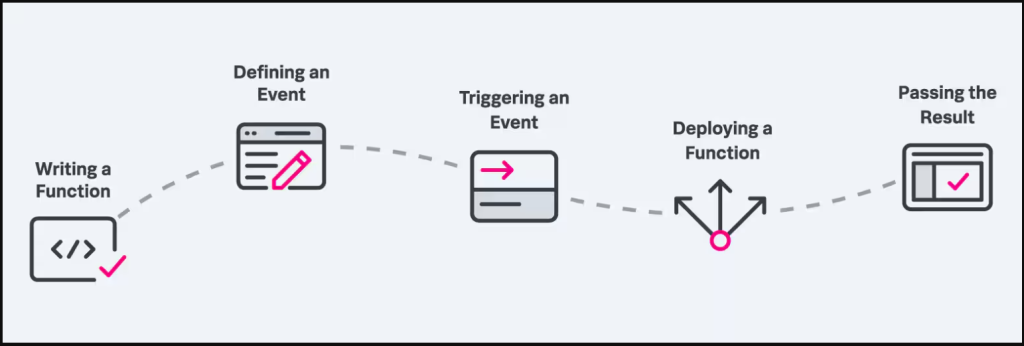
2. Write Your First Serverless Function
Now that your environment is set up, it’s time to write the serverless function itself. This simple function will return a “Hello, World!” message when triggered by an HTTP request.
Steps to Write Your Serverless Function
- Choose a Programming Language: AWS Lambda supports multiple programming languages, such as Node.js, Python, Java, Go, and Ruby. Choose a language based on your preference or familiarity.
- Write the Function Code: In this example, we will use Node.js. Here’s a simple Lambda function that returns a “Hello, World!” response:
exports.handler = async (event) => { return { statusCode: 200, body: JSON.stringify({ message: 'Hello, World!' }), }; };This function is an asynchronous handler that takes an event object as input and returns a JSON response with the message. - Test Locally: Before deploying to AWS, test your function locally using the AWS SAM (Serverless Application Model) or a local testing tool to ensure that the code behaves as expected.
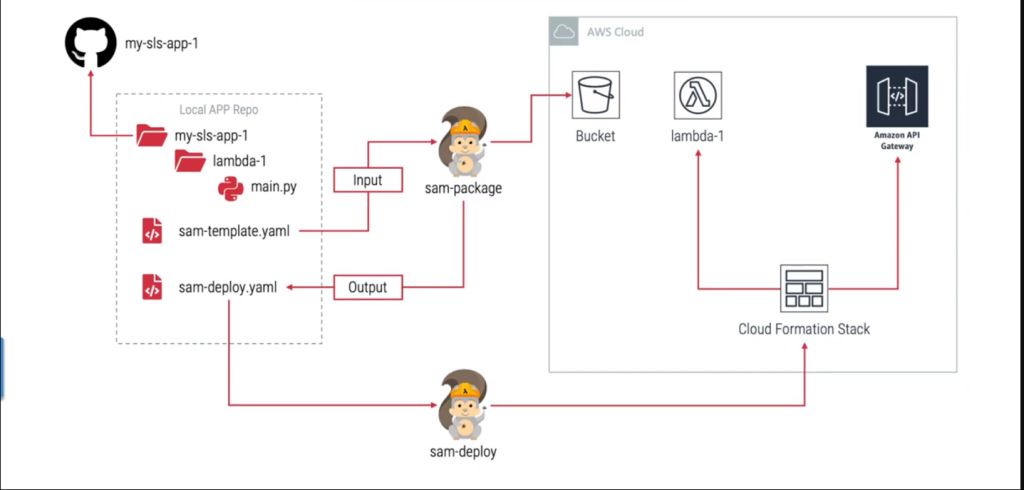
- Package Your Code: Package your code and any dependencies into a zip file or use AWS’s deployment tools (such as AWS CloudFormation or AWS CDK) to handle packaging and deployment.
3. Deploy Your Serverless Function to AWS Lambda
With your function written, it’s time to deploy it to AWS Lambda. This step involves creating the function in the AWS Management Console or using the AWS CLI for deployment.
Steps to Deploy Your Serverless Function
- Navigate to AWS Lambda Console: Log in to the AWS Management Console and go to the Lambda Console. Click “Create function” to create a new function.
- Create the Lambda Function: Select “Author from Scratch” and choose Node.js as your runtime (or the runtime that matches your function’s code).
- Configure the IAM Role: Choose the IAM role that you created earlier to ensure your Lambda function has the necessary permissions to execute and interact with other AWS services (such as API Gateway).
- Upload Your Code: Upload your zipped function code or connect to a source like S3 if necessary. If you’re using AWS CDK or other deployment tools, deploy the code directly from your development environment.
- Set Function Timeout: Configure the maximum execution timeout for your function (e.g., 3 seconds or less for a simple function).
- Create Function: After configuring the function settings, click “Create function” to deploy your Lambda function to AWS.
4. Set Up API Gateway to Expose Your Function
In order to expose your Lambda function to the web, you need to set up API Gateway to trigger the function whenever an HTTP request is made. API Gateway acts as a proxy for your Lambda function, making it accessible through a RESTful API.
Steps to Set Up API Gateway
- Create a New API: In the API Gateway Console, select “Create API” and choose the REST API option. This will be the API that serves as the interface for accessing your Lambda function.
- Define Resources: Resources represent the URL endpoints of your API. For example, create a resource
/hellowhich will trigger the Lambda function when accessed. - Set Up HTTP Methods: Under the newly created resource, define the HTTP methods you want to support, such as GET, POST, or PUT. For this example, you can set up a GET request for
/hello. - Integrate with Lambda: When setting up the method, choose “Lambda Function” as the integration type. Then, link your API method to the Lambda function you created earlier.
- Deploy the API: Deploy your API by selecting the “Deploy API” option. Choose a stage name (e.g.,
prod) and note the generated API URL (e.g.,https://xyz.execute-api.us-east-1.amazonaws.com/prod/hello).
5. Test Your Serverless Application
Once your Lambda function is deployed and integrated with API Gateway, it’s time to test your serverless application. You’ll interact with the API via an HTTP request, and if everything is set up correctly, you should receive a response from the Lambda function.
Steps to Test Your Serverless Application
- Invoke the API: Open a web browser or use a tool like Postman or cURL to make an HTTP GET request to your API Gateway URL (e.g.,
https://xyz.execute-api.us-east-1.amazonaws.com/prod/hello). - Check the Response: If everything is working properly, you should receive a JSON response like this:
{ "message": "Hello, World!" } - View Logs in CloudWatch: AWS Lambda automatically logs function invocations to CloudWatch Logs. You can view execution logs in the CloudWatch console to ensure that the function ran as expected.
- Monitor Metrics: AWS Lambda integrates with CloudWatch Metrics to provide insights into your function’s performance, such as invocation count, execution duration, and error rates.
6. Optimize and Scale Your Serverless Application
As your application grows, you may need to optimize performance and scale to meet demand. Serverless platforms like AWS Lambda automatically scale based on request volume, but there are additional steps you can take to optimize your application for better performance and cost efficiency.
Optimization and Scaling Tips
- Adjust Memory Allocation: Lambda allows you to allocate memory to your function. Increasing memory allocation can improve performance but may increase costs, so monitor performance and adjust accordingly.
- Reduce Cold Start Latency: Cold start latency is the time taken for Lambda to initialize and execute a function when it hasn’t been invoked recently. To minimize cold start times, optimize your code’s size and reduce dependencies.
- Use API Gateway Caching: For frequently accessed endpoints, enable caching in API Gateway to reduce load on your Lambda function and improve response times.
- Manage Concurrency: If your function is expected to handle a high volume of requests, you can set concurrency limits for Lambda to ensure it handles traffic efficiently.
- Leverage Lambda Layers: Use Lambda layers to manage shared code and libraries. Layers enable you to reuse common dependencies across multiple functions, improving deployment times and reducing the overall size of the function code.
Deploying Serverless Applications with Ease
Building and deploying a serverless application has never been easier, thanks to tools like AWS Lambda and API Gateway. With serverless computing, you can create scalable, cost-efficient applications without worrying about infrastructure management. Whether you’re building an API, event-driven service, or background job, serverless computing provides the flexibility and performance needed to meet modern application demands.
By following the steps in this guide, you can quickly deploy a serverless application, optimize it for scalability, and monitor its performance—all without needing to manage servers or worry about infrastructure. Serverless is the future of cloud computing, and with the right tools and understanding, you can leverage its benefits to build and deploy applications in minutes.