Upgrade & Secure Your Future with DevOps, SRE, DevSecOps, MLOps!
We spend hours scrolling social media and waste money on things we forget, but won’t spend 30 minutes a day earning certifications that can change our lives.
Master in DevOps, SRE, DevSecOps & MLOps by DevOps School!
Learn from Guru Rajesh Kumar and double your salary in just one year.
Introduction to CI/CD in Mobile App Development
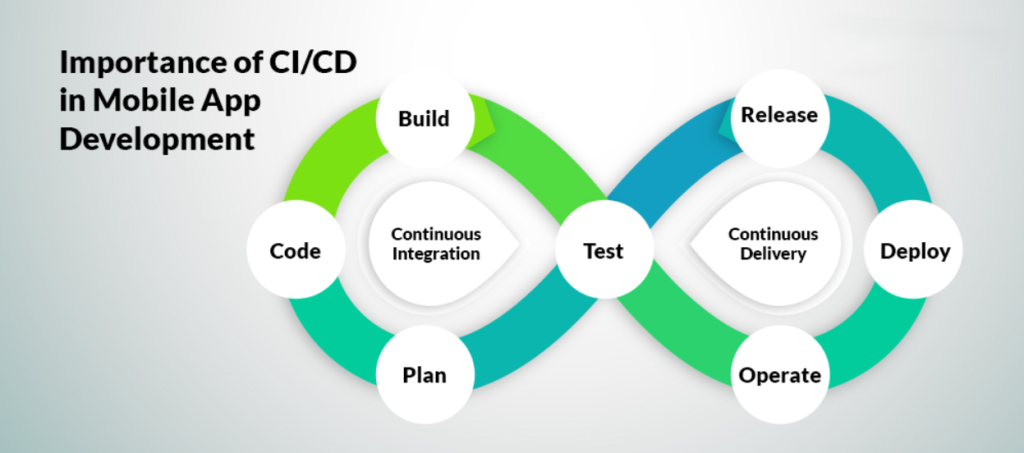
In the fast-paced world of mobile app development, delivering features quickly without compromising quality is critical. This is where Continuous Integration (CI) and Continuous Delivery/Deployment (CD) come into play. CI/CD practices streamline how developers integrate code, test applications, and release updates. Unlike web development, mobile app CI/CD involves unique challenges, such as platform fragmentation, device-specific testing, app signing, and app store submission. By implementing CI/CD, teams can automate most of these processes, resulting in faster, safer, and more reliable releases. In this post, we’ll walk through how to build an effective CI/CD pipeline for mobile apps and explore its key features and benefits.
Major Features and Benefits of CI/CD for Mobile Apps
A robust CI/CD pipeline tailored for mobile app development offers several features that boost productivity and product quality. With mobile apps, developers face different operating systems (Android and iOS), multiple devices, and the need for manual app signing and approvals before publishing to stores. Automation reduces errors and speeds up delivery by handling repetitive tasks, freeing developers to focus on writing quality code.
Key Features of Mobile CI/CD Pipelines Include:
- Automated code integration with each commit to the repository.
- Dynamic build generation for both Android (.APK/.AAB) and iOS (.IPA) platforms.
- Automated test execution (unit, UI, and integration tests) across devices.
- App signing and versioning embedded within the pipeline.
- Support for multi-environment configurations (dev, staging, production).
- Seamless deployment to app testers (TestFlight, Firebase App Distribution).
- Automated delivery to app stores (Google Play Store, Apple App Store).
- Real-time notifications on pipeline success or failure.
These features ensure teams can detect issues early, deliver features faster, and deploy confidently, knowing the app has already passed rigorous automated testing.
Step 1: Set Up Version Control and Branching Strategy
Every CI/CD pipeline starts with version control. For mobile projects, tools like GitHub, GitLab, or Bitbucket are commonly used. Mobile teams need a structured branching strategy to manage feature development, testing, and releases efficiently.
Recommended Branching Strategy:
- Main branch for production-ready code.
- Develop branch for ongoing development and integration testing.
- Feature branches for new features.
- Release branches for preparing releases.
- Hotfix branches for urgent bug fixes in production.
By defining these branches, CI pipelines can be triggered based on branch events. For example, a push to the develop branch could trigger a build and test pipeline, while a push to the release branch could trigger deployment pipelines.
Step 2: Choose and Configure a CI/CD Platform

With version control in place, the next step is selecting a CI/CD platform that supports mobile projects. Mobile app CI/CD tools must support both Android and iOS projects, handle app signing, and integrate with app stores and device farms for testing. Some popular tools include:
- Bitrise – Mobile-focused with strong Android and iOS support.
- GitHub Actions – Great for teams already using GitHub.
- Codemagic – Optimized for Flutter, but supports native apps too.
- Jenkins – Fully customizable with plugins for mobile projects.
- App Center – Microsoft’s platform for building, testing, and distributing apps.
- CircleCI – Flexible workflows for both iOS and Android.
Key Configuration Steps
- Connect the VCS repository (GitHub, GitLab, Bitbucket).
- Create pipelines for Android and iOS builds.
- Configure environment variables for API keys, certificates, and signing keys.
- Add triggers to run builds on every push, pull request, or merge.
The choice depends on factors like team size, budget, existing tools, and platform requirements. Dedicated mobile platforms like Bitrise and Codemagic offer pre-configured workflows that accelerate setup, especially for Flutter, React Native, or hybrid apps.
Step 3: Automate Builds and App Signing
Automating the build process is the core of any mobile CI/CD pipeline. Mobile builds are more complex than web builds due to platform-specific requirements like Gradle for Android and Xcode for iOS. Additionally, code signing is mandatory for publishing apps to stores, which adds another layer of complexity.
Best Practices for Mobile Builds
- Trigger builds on every commit, PR creation, and merge.
- Use cached dependencies (Gradle caches, CocoaPods caches) to speed up builds.
- Automatically manage version numbers using pipeline scripts (incrementing version codes).
- Ensure iOS provisioning profiles and Android keystores are securely stored.
- Automate app signing during the build using Fastlane or native tools.
- Archive build artifacts (APKs, AABs, IPAs) for distribution.
Having fully automated builds and signing ensures every code change results in a production-ready build, reducing human error and delays.
Step 4: Integrate Automated Testing in the Pipeline
Testing is crucial for mobile apps to ensure they work across devices, screen sizes, and OS versions. A well-configured CI/CD pipeline automatically runs tests whenever new code is pushed, ensuring that bugs are caught early.
Types of Tests to Automate
- Unit Tests – Test individual functions and components.
- UI Tests – Simulate user interactions across app screens.
- Integration Tests – Test combined functionality across modules.
- Performance Tests – Detect slowness or memory leaks on different devices.
Recommended Testing Tools
- JUnit, Espresso (Android)
- XCTest, XCUITest (iOS)
- Appium (cross-platform)
- Firebase Test Lab (for running tests on real devices in the cloud)
By embedding these automated tests into the pipeline, teams can prevent critical bugs from reaching production, ultimately improving app quality and user satisfaction.
Step 5: Deploy to Beta Testers and App Stores
Once builds pass all tests, the next step is deploying to testers or app stores. Manually uploading builds to TestFlight, Google Play Console, or Firebase App Distribution is time-consuming and error-prone. Automating this step saves time and ensures consistency across releases.
Deployment Best Practices
- Use Fastlane to automate both Android and iOS deployments.
- Configure beta distribution for internal teams using Firebase App Distribution (Android) or TestFlight (iOS).
- Auto-generate release notes from commit messages or changelogs.
- Manage release tracks (internal, alpha, beta, production) directly in the pipeline.
- Notify stakeholders automatically after every successful release.
With automated deployments, you ensure all app releases follow the same structured process, reducing risk and simplifying version management across platforms.